Hello!
Ask me any question about Lympik.
Please be as specific as possible so I can help you better.
Create profile and identify athletes
The first step in using the Lympik system is to create a profile. To do this, go to our webapp app.lympik.com . You can also scan the QR code on the back of the Lympik NFC chip with your phone's camera and you will be automatically redirected to our web app.
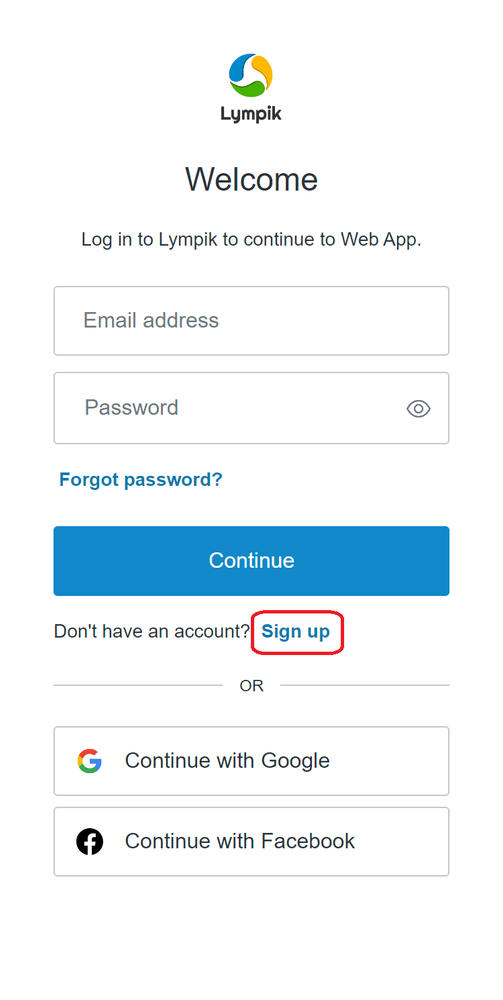
The registration in the web app is done with your e-mail address and a password - there is also a quick log-in via Facebook or Google, but this is only suitable for athletes. If the access is to be used by different coaches, please make sure you choose access data that you can pass on. Then get in touch with your dealer - they will link your purchased devices to your profile and activate it accordingly.
In order for your athletes to get personalised times, each athlete must be identified. Therefore they need to create a free profile in our webapp app.lympik.com . Your athletes can also scan the QR code on the back of the Lympik NFC chip with their mobile phone camera - they will be automatically redirected to our webapp - the identification serves to ensure that the measured results are immediately assigned to the respective athlete. Their times are automatically displayed in their own profile and all the runs they have taken part in are automatically documented for them.
The NFC chips are compatible with all Lympik modules, so it is advisable to leave the chip with the athlete for all future runs, competitions, etc. In addition, a personalised chip works across all Lympik systems - this means the athlete can use their own chip with any coach or club with a Lympik system.
Add NFC-Chip with QR codes
By scanning the QR code on the back of a Lympik NFC chip with a mobile phone camera - your Athlete will automatically be connected to our web app where he/she can register and personalise his/her chip:
Once the athlete has registered, the chip is assigned to the created profile and your athlete is ready to go.
Please note: If the smartphone asks for camera permissions, your athlete must click on ‘allow’.
Add NFC-Chip manually
If the scan with your athletes mobile phone camera was not successful, your athlete needs to navigate to app.lympik.com and log in there with email, Facebook or Google. By clicking on the three dashes in the top right-hand corner your athlete accesses the menu. Next step is to click on ‘Identifications’ and then on ‘Add chip’.

Your athlete can now add the chip by entering the chip code manually after clicking on the relevant field. The chip is now personalised. It is possible to use different chips as identification with our Lympik products (wristbands, stickers, lift cards, etc.). It is also possible to add several chips to a profile.
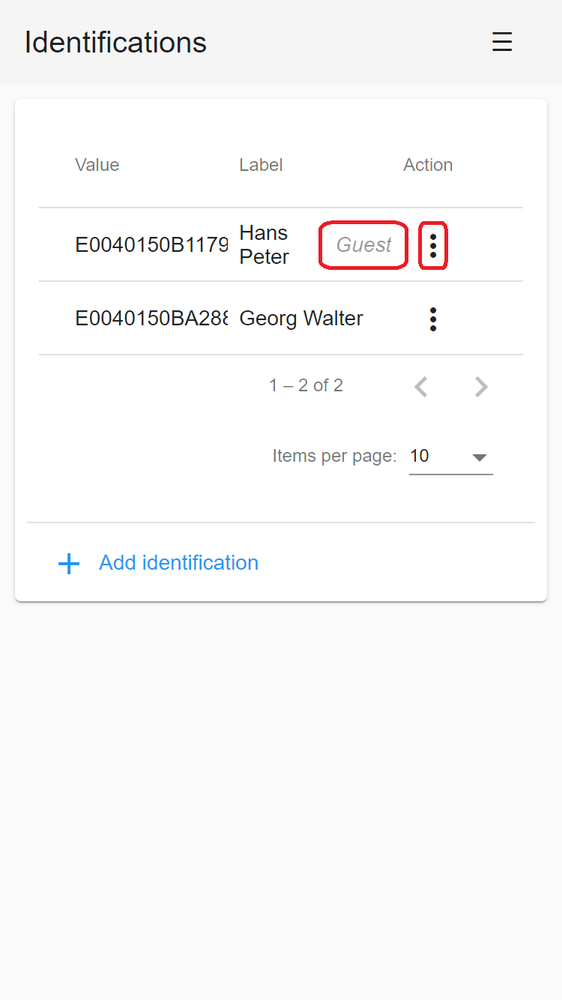
Guest Chip
It is possible to provide an athlete with a guest chip. This option is used to display the name of the guest athlete in the evaluation if the athlete doesn't have a Lympik profile. All the advantages of the personalised chip do not apply here, as this chip does not require an athlete profile. The guest chip is created via your trainer profile.
To add a guest chip, navigate to the menu item "Identifications" in the left column of the application. To open the menu on your phone, press the 3 dashes in the top right corner. Click on 'Add Identification' and add a chip by scanning a QR code or entering the code manually:

To turn this chip into a guest chip, click on the three dots (under Action) and activate guest mode - don't forget to enter your guest's name so that it appears in the results. This way the correct name will always be shown in the results. When your guest returns their chip, you can deactivate guest mode or change the name to a new guest. Whether or not guest mode is enabled is displayed to the right of the name: